Screenshots can be quite helpful. Whether you want to capture a screenshot on your Mac for artwork or only to share it with family, friends, and team members, you must know how to take a screenshot on a Mac.
Macs have highlighted a built-in tool for getting a screenshot of whatever you want- a full screen, just a portion of the screen, or a specific window with or without a shadow. The only difficulty is, Macs used to cover their screenshot tools behind keyboard shortcuts. So, if you’re excited to know how to take a screenshot on a Mac, here are some simple tricks for you to know.
How To Take A Screenshot On A Mac
To take a screenshot on a Macbook, there are few keyboard shortcuts to memorize. Whether you got a desktop Mac or a MacBook, the screenshot shortcuts rest the same. MacBook Pro users have some additional screenshot shortcut features. All these shortcuts operate on macOS Big Sur, Mojave, and Catalina.
#1. Take a Screenshot of the entire screen
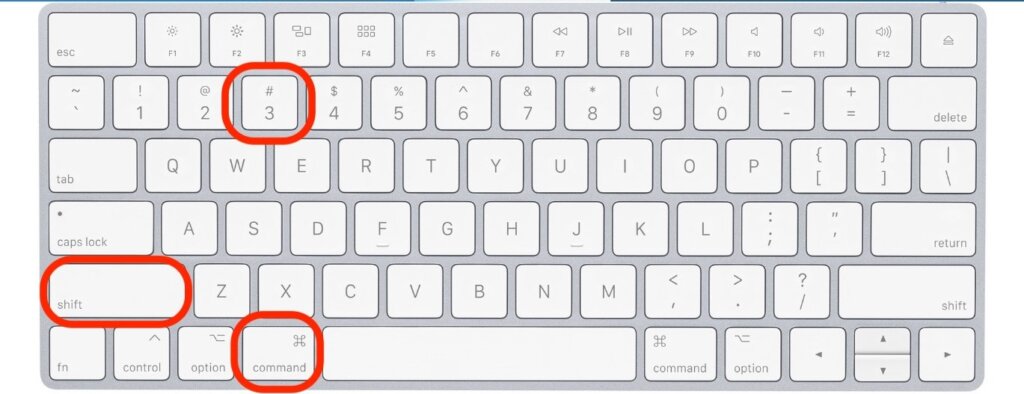
Gently hold ‘Command + Shift + 3’ to capture a screenshot of the entire screen. The best of this is that it will capture screenshots of all the screens (multiple also) at once. For example, if there is more than one screen, it will snap the screenshot of every screen one by one easily.
#2. Take a Screenshot of the selected window
Gently hold ‘Command + Shift + 4’ and then click on the window to take a screenshot of the particular window you want. It is just the beginning in this section; to fine-tune on screenshots, use the following shortcuts as follows:
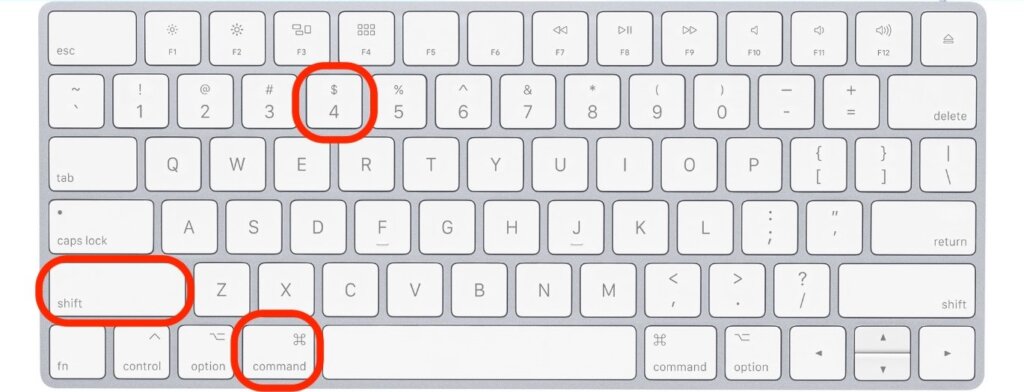
- Select a part of the screen using “Command + Shift + 4”, and then hold down the “Space Key” to relocate the selection of the window around the Mac screen.
- Go for command + shift + 4 and hold down the “shift key” while electing the area. It will let to adjust the height without any mistakenly altering the width, and vice-versa.
#3. Take a Screenshot of the selected portion of the screen
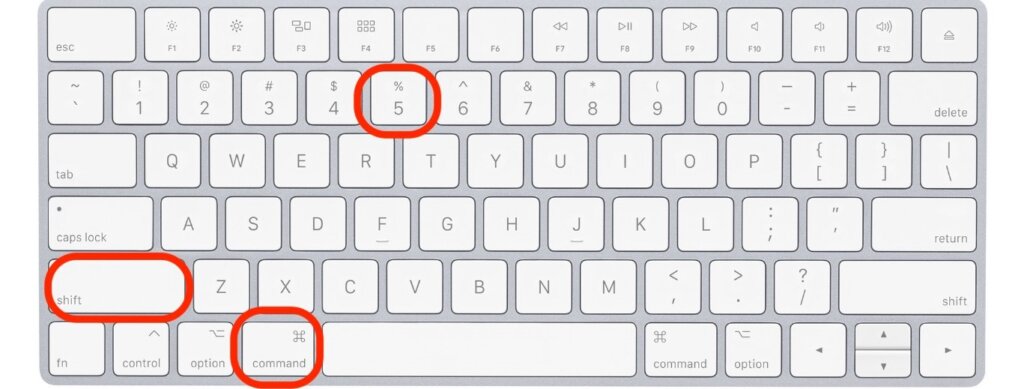
Gently hold “Command+Shift+5″ to take a screenshot of a specific portion of the screen, and the pointer will turn into a camera icon. Then move the camera over the selected part, then tick to save the picture on .png file format on your desktop Mac.
#4. Take Screenshots With New MacBook Pro (Touch Bar)
New MacBook Pro comes with a Touch Bar instead of traditional use keys. Alternatively, you can attach a camera icon to Touch Bar and save a screenshot with a couple of taps.
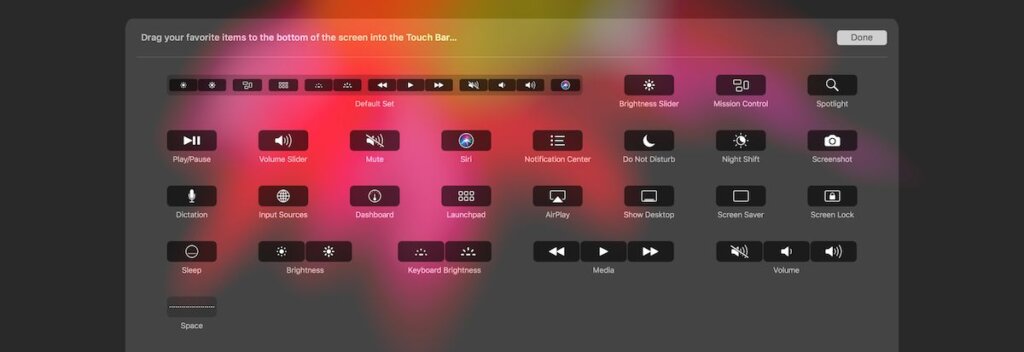
First, open Keyboard preferences and click on the Customize Control Strip button at the base of the window. Doing that will show all the possibilities you can use on a Touch Bar. Click and drag the camera icon to the Touch Bar, then save the changes to capture Screenshots.

Tips: Need to take a screenshot of the full Touch Bar? Press “Command+Shift+6” to save a screenshot of the full Touch Bar to the Mac desktop.
Also read:
- How to take a Screenshot on Laptop?
- 8 Best Android Emulators For Windows PC And Mac [2020 Edition]
- How to install apps on Mac? Free software download sites for Mac.
- How to edit Photos ? 5 Best Ways
- How to upload a video on Youtube
How to record screen on a Mac?
macOS also includes a screencast tool named QuickTime. To record a screen on a Mac, open QuickTime, then click on the “New Screen Recording” and click on the red record button to start recording your screen. After that, you can save the screen activities in the video form or clip it to display only the segment you require if you want.


