If you are someone who does not know how to use GitHub then definitely this article is for you.
First, let us clear you that Git is not the same thing as GitHub, Git is a version control system that helps you to keep track of your files and the changes also.
It also allows you to collaborate with your friends on a program, code, or any file.
GitHub is a website that hosts a Git server program to hold your code.
What is GitHub?
GitHub is a code or file-sharing service to collaborate with different people. It is helpful when more people are working on a project.
Why do we need GitHub?
Using GitHub you make it easier to get the best documentation.
GitHub can even integrate with common platforms with services like Code Climate to track your feedback.
When multiple people collaborate on a project, it’s very hard to keep track of revisions. But GitHub takes care of these problems by keeping track of all changes that have been pushed to the repository.
Now let’s learn how to use GitHub
Step1: Create a GitHub account
To create your GitHub account, you need to go to the GitHub website and fill out the registration form. This is the first step on ‘how to use GitHub’
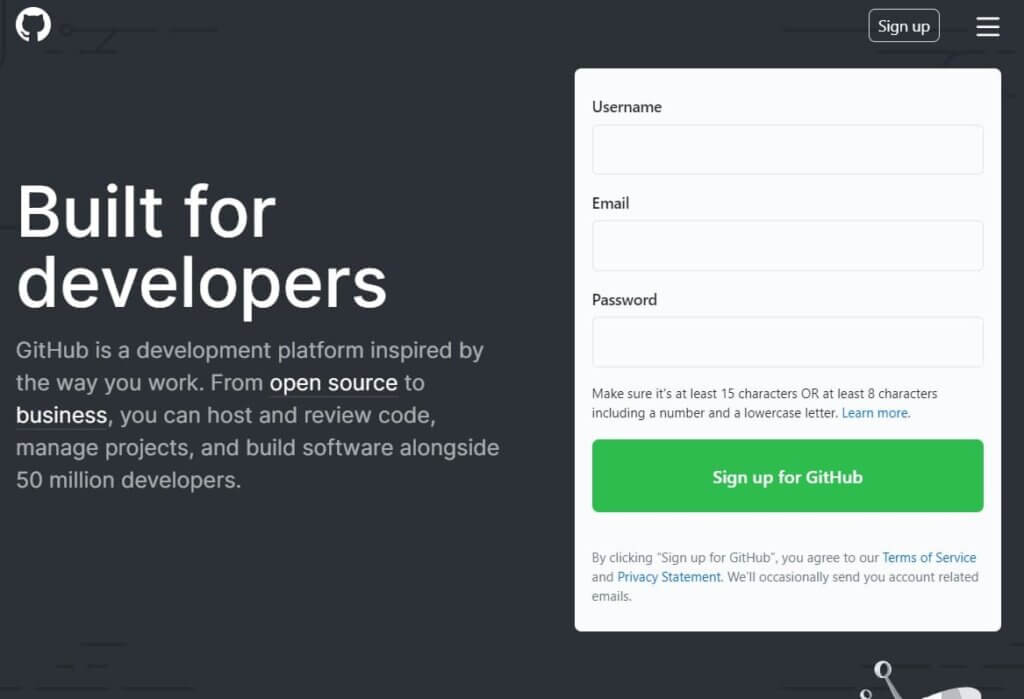
Step2: Create a GitHub repository
A repository is a storage space where your project will be uploaded.
A repository can be local to a folder on your computer, or it can be a storage space on GitHub. You can easily keep track of code files or text files in a repository. This is the second step on ‘how to use GitHub’
You need a Github repository when you have done some changes on your file or code and are ready to be uploaded.
Follow the simple steps to create your repository.
Click on “Start a new project”.

Enter your repository name and click on “Create Repository”.If you want to give a decision then you can.
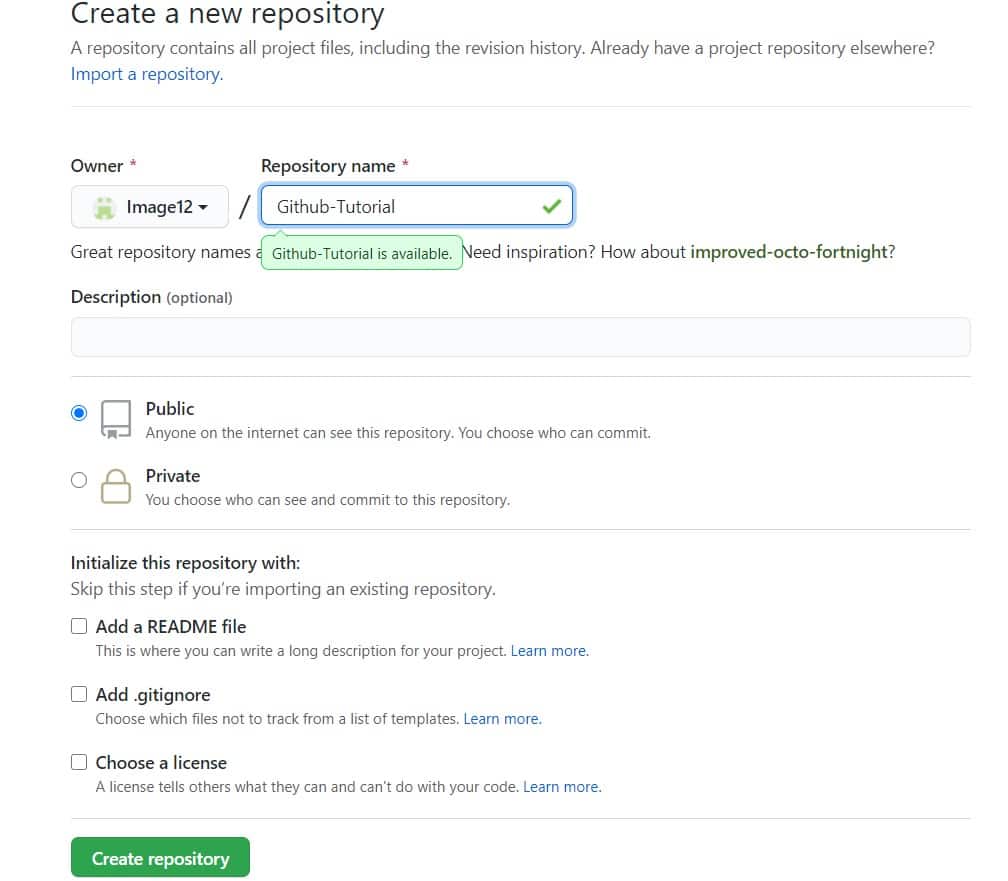
Now if you have already noticed that by default a GitHub repository is public which means that anyone can see the content of this repository.
While creating a repository there will be a Readme file also. This file contains the description of the file and once you check this box, this will be your first file inside your repository.
Your repository is successfully created.
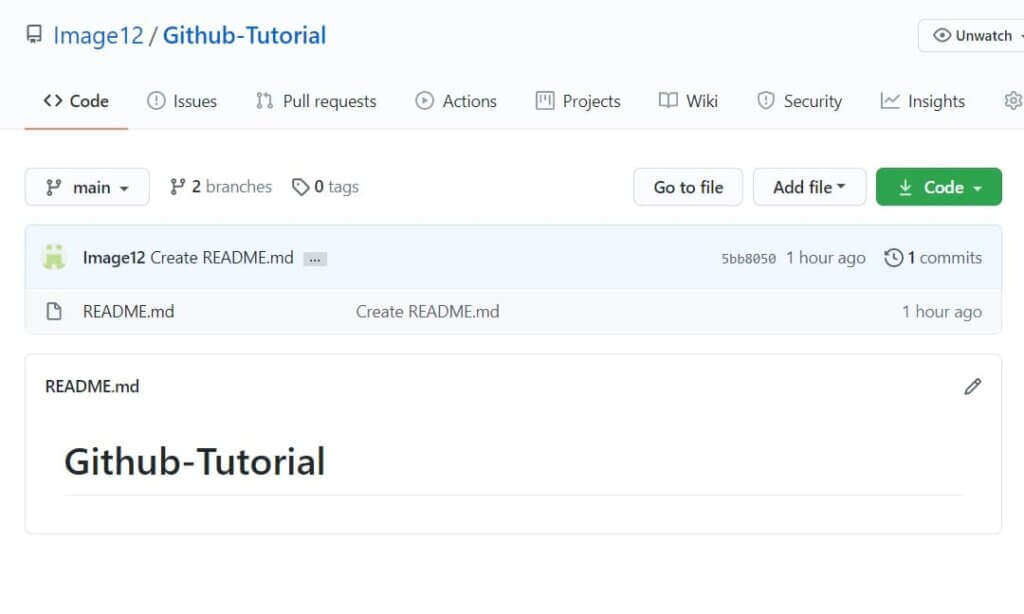
Once this is done you are ready to commit, push, and perform all the other operations in Github.
Now let’s understand branching in GitHub
Step3: Create Branches and Perform Operations
Branches help you to work on different versions of a repository at a single time. This is the third step on ‘how to use GitHub’.
Let’s say you want to add new features and also you are afraid at the same time whether to make changes to your main project or not. This is where git branching comes to help you.
To create a branch in Github, follow the following steps:
You have to click on the dropdown which is “Branch: master”
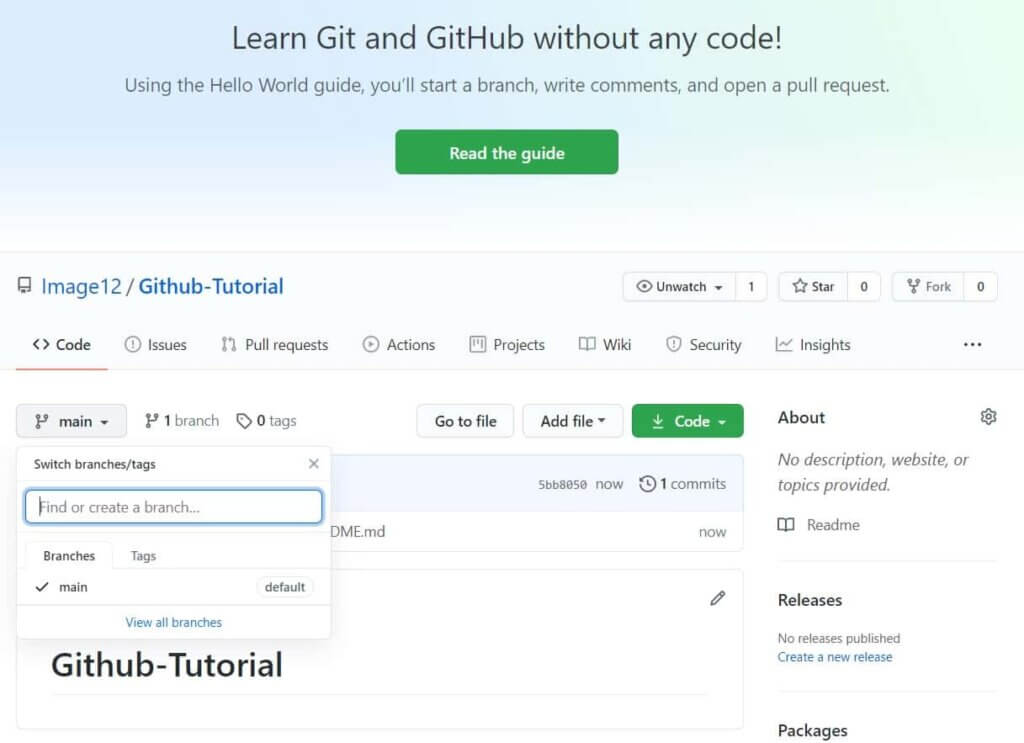
After that, you will find an existing branch or you can easily create a new one. Once you have created a new branch, you will get two branches in your repository. And the new branch is just a copy of the master branch.
So let’s make some changes to our new branch and make it look different from the master branch.
Step4: How to use Github Operations
Commit command
Commit command helps you to save the changes in your file.
Whenever you commit a file, you should always provide the message, just to keep in mind that the changes are done by you. This is the fourth step on ‘how to use GitHub’
Though this message is not compulsory it is always recommended so that it can differentiate various versions.
Now lest make your first commit, follow the below steps.
You have to click on the “readme-changes “files which you have just created.
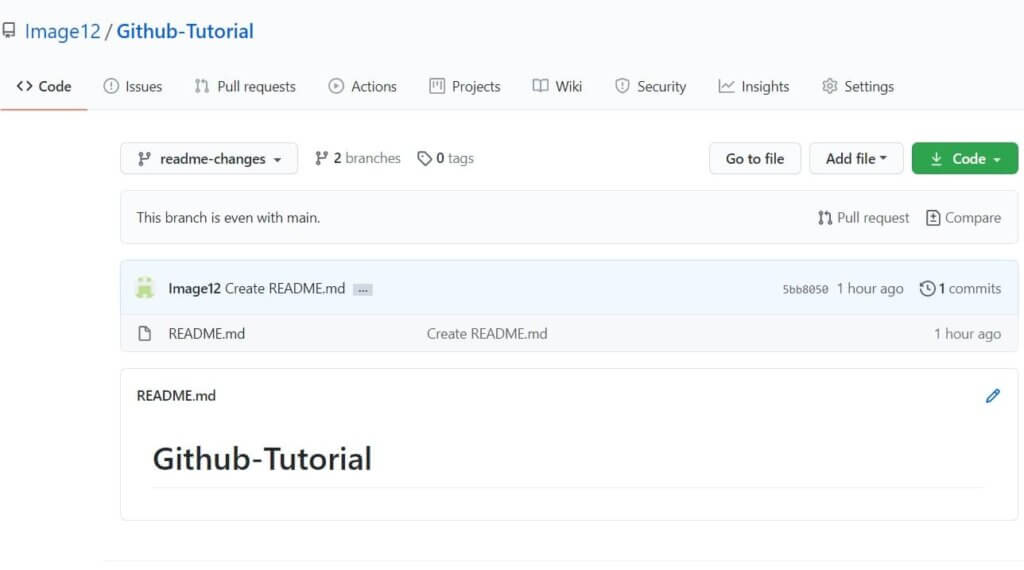
You have to click on the “edit” or a pencil icon in the rightmost corner of the file.
Once you click on that, an editor will open where you can make any changes or anything you want to.
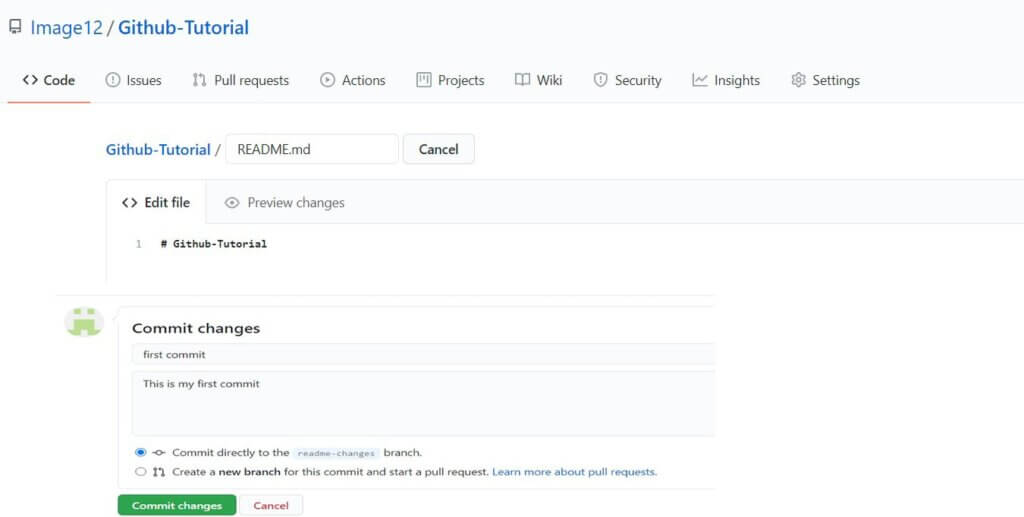
You have to write a commit message which identifies your changes.
At last Click commit changes
Pull Command
It is one of the most important commands in Github.
It tells you the changes done in the file and requests other contributors to view it as well as merge it with the master branch.
Follow the steps to pull request on GitHub
You have to click the ‘Pull request’ tab
After that click ‘New pull request’
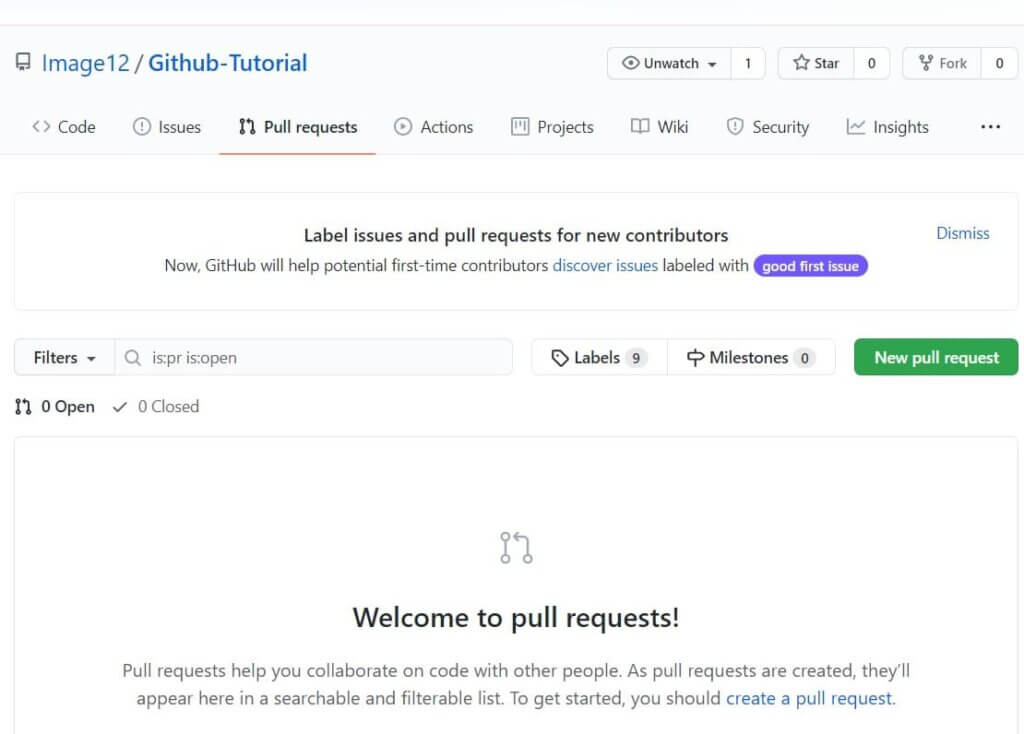
Once you click on the pull request, select the branch and click the ‘readme-changes’ file to view changes between the two files in your repository
Click Create pull request
At last, enter any title or description to your changes and click on “Create pull request”
Merge Command
This command is used to merge the changes into the main master branch.
Follow the below steps to merge the pull request.
• First you have to click on “Merge pull request” to merge the changes into the master branch.
• After that click on “Confirm merge”.
• Now you can delete the branch once all the changes have been incorporated and if there are no conflicts.
Now let us move to our last topic in ‘how to use Github’
Step5: Cloning Github Repository
Before talking about cloning a Github repository, forts let us understand why we need to clone a repository. The answer is simple. Suppose you want to use some which are present in the public repository, you can directly copy the content by cloning or downloading
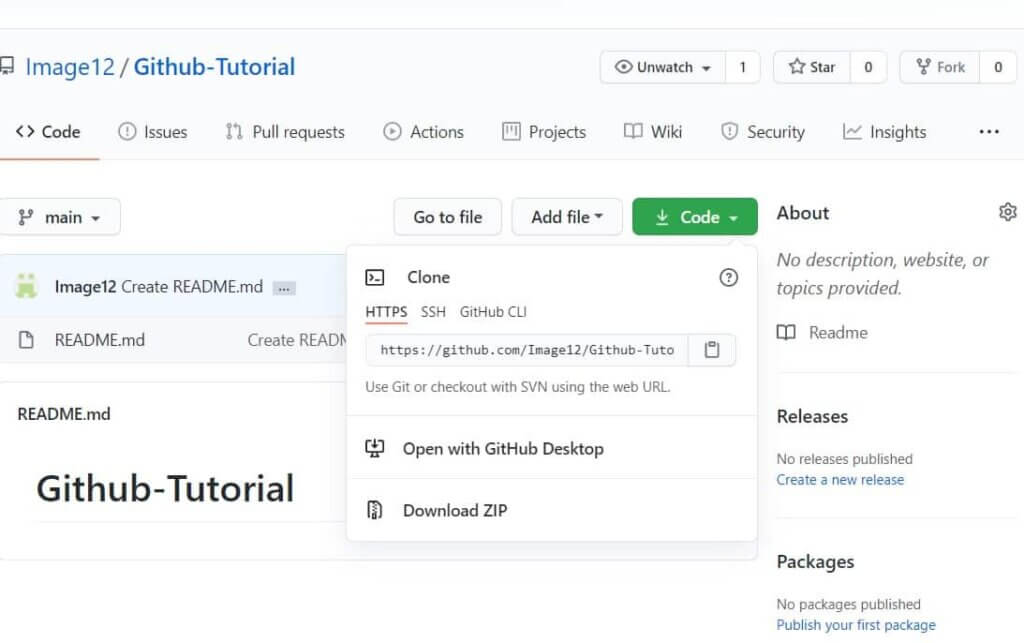
Cloning is really very simple!
Final Thoughts
Now hopefully you can easily create your own GitHub account and use it by following all the guidelines we have mentioned above on ‘how to use GitHub’.
Don’t forget to comment below if you like what you have just read.


